
Eggstravagant Easter Eggs
Because you like me need another project...

But wait... stop... don't pass this one up these eggs are stinkin cute, and super easy!!!

Get your gear together: Eggs of all sizes. The plastic ones like you find at the "super" stores and "craft" stores. (This purple egg was awesome...it came with two smaller eggs inside! Score!!) Paint brushes. Hot glue gun of course. Buckets or boxes for the sand. Colored sand. Glittered sand. Modge podge. Ribbon. Stickers. Doodads for your toppers...little chicks, flowers, grass, etc. Tea cups to display your eggs.
(I forgot to take pictures along the way...I hope this makes since!)
1. Coat the spot on the egg where you are going to put the sticker with modge podge, and slap the sticker on the spot. Then cover the the top of the sticker with modge podge. Set this aside and let it dry.


2. Then pour the sand and glitter sand mixture you are going to use to cover your egg in a box or plastic tub (I like to do this outside if we are not having tornadic breezes on the hill because it can be messy). Once your sticker area is dry put a thin layer of modge podge all over the rest of your egg leaving an oval around your sticker area. You don't want the sand to cover up your sticker. Then hold your egg over your container and using your hand cover your egg with the sand mixture. Tap off any excess.

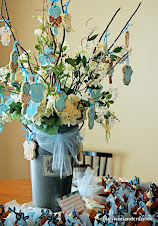
3. Sit your egg on a coffee cup or other item to keep it stable so you can work on the topper. Hot glue ribbon up both sides of your egg and add a bow at the top. Then I usually start with Easter grass and hot glue it to the top for a nest. Then I just add little chicks or flowers to fill it in. Voila!!
Tell your friends that they took hours to make and they will be very impressed with your artistic abilities!


 no-repeat left"><a href="http://picasaweb.google.com/amyblake3/RowdyGirlJewelry?feat=embedwebsite"><img src="http://lh6.ggpht.com/_K2An-tyRrrM/SvTNvC4m0kE/AAAAAAAAAeg/TqqwZYz4Pxo/s160-c/RowdyGirlJewelry.jpg" width="160" height="160" style="margin:1px 0 0 4px;"></a></td></tr><tr><td style="text-align:center;font-family:arial,sans-serif;font-size:11px"><a href="http://picasaweb.google.com/amyblake3/RowdyGirlJewelry?feat=embedwebsite" style="color:#4D4D4D;font-weight:bold;text-decoration:none;">Rowdy Girl Jewelry</a></td></tr></table>)


1 comment:
You've been a busy Easter Chicky!
They're adorable.
Post a Comment